Custom map images can be added to the app using the following format.
Projection: NZTM2000
Tile size: 1024 by 1024 pixels
File format: jpeg
Filename format: mzzxxxxyyyy.jpg where zz is the zoom index, xxxx is the easting index from the reference easting, and yyyy is the northing index from the reference northing. Easting and northing indexes are zero based and relative to the western and northern most corner (top left) of the image.
Reference easting: 1560000 (North), 1080000 (South)
Reference northing: 6200000 (North), 5550000 (South)
Scale: 0.47244 pixels per meter for zz=10, 0.23622 pixels per meter for zz=09, 0.11811 pixels per meter for zz=08, 0.05905 pixels per meter for zz=07, etc
To use the custom images, save them to a directory on your phone and then select this directory from the custom map selector on the settings page in the app. The map layer button will now cycle between the topographic map, the aerial images, and your custom images (with topographic images filling in the gaps). The current version of the app displays images at zoom levels 03,05,07,09,10. Other zoom levels are ignored.
Example #1: North Island tile m0700010001.jpg (zoom level 07, easting index 0001, northing index 0001). The scale for zoom level 07 is 0.05905 pixels per meter, so a 1024 by 1024 pixel image will span 17,340 m (1024/0.05905). The top left coordinate for the image will be 1560000+17340*0001 = 1577340 east, and 6200000 – 17340*0001 = 6182660 north. The bottom left coordinate will be offset by a further 17340 m (1594680 east, 6165320 north). Using the LINZ topo250 series, the image is a follows.

Example #2: For a touch of old school navigation courtesy of James Cook, download and unzip these files to your phone (North Island James Cook Map). Select the folder under Custom Maps in the app settings, and then cycle the topo/satellite map button until you see the ‘C’.
Example #3: Akatarawa Map
This example is based on an annotated map of the Akatarawa Forest from the Greater Wellington Regional Council. This is for example purposes and doesn’t necessarily represent current or useful information.
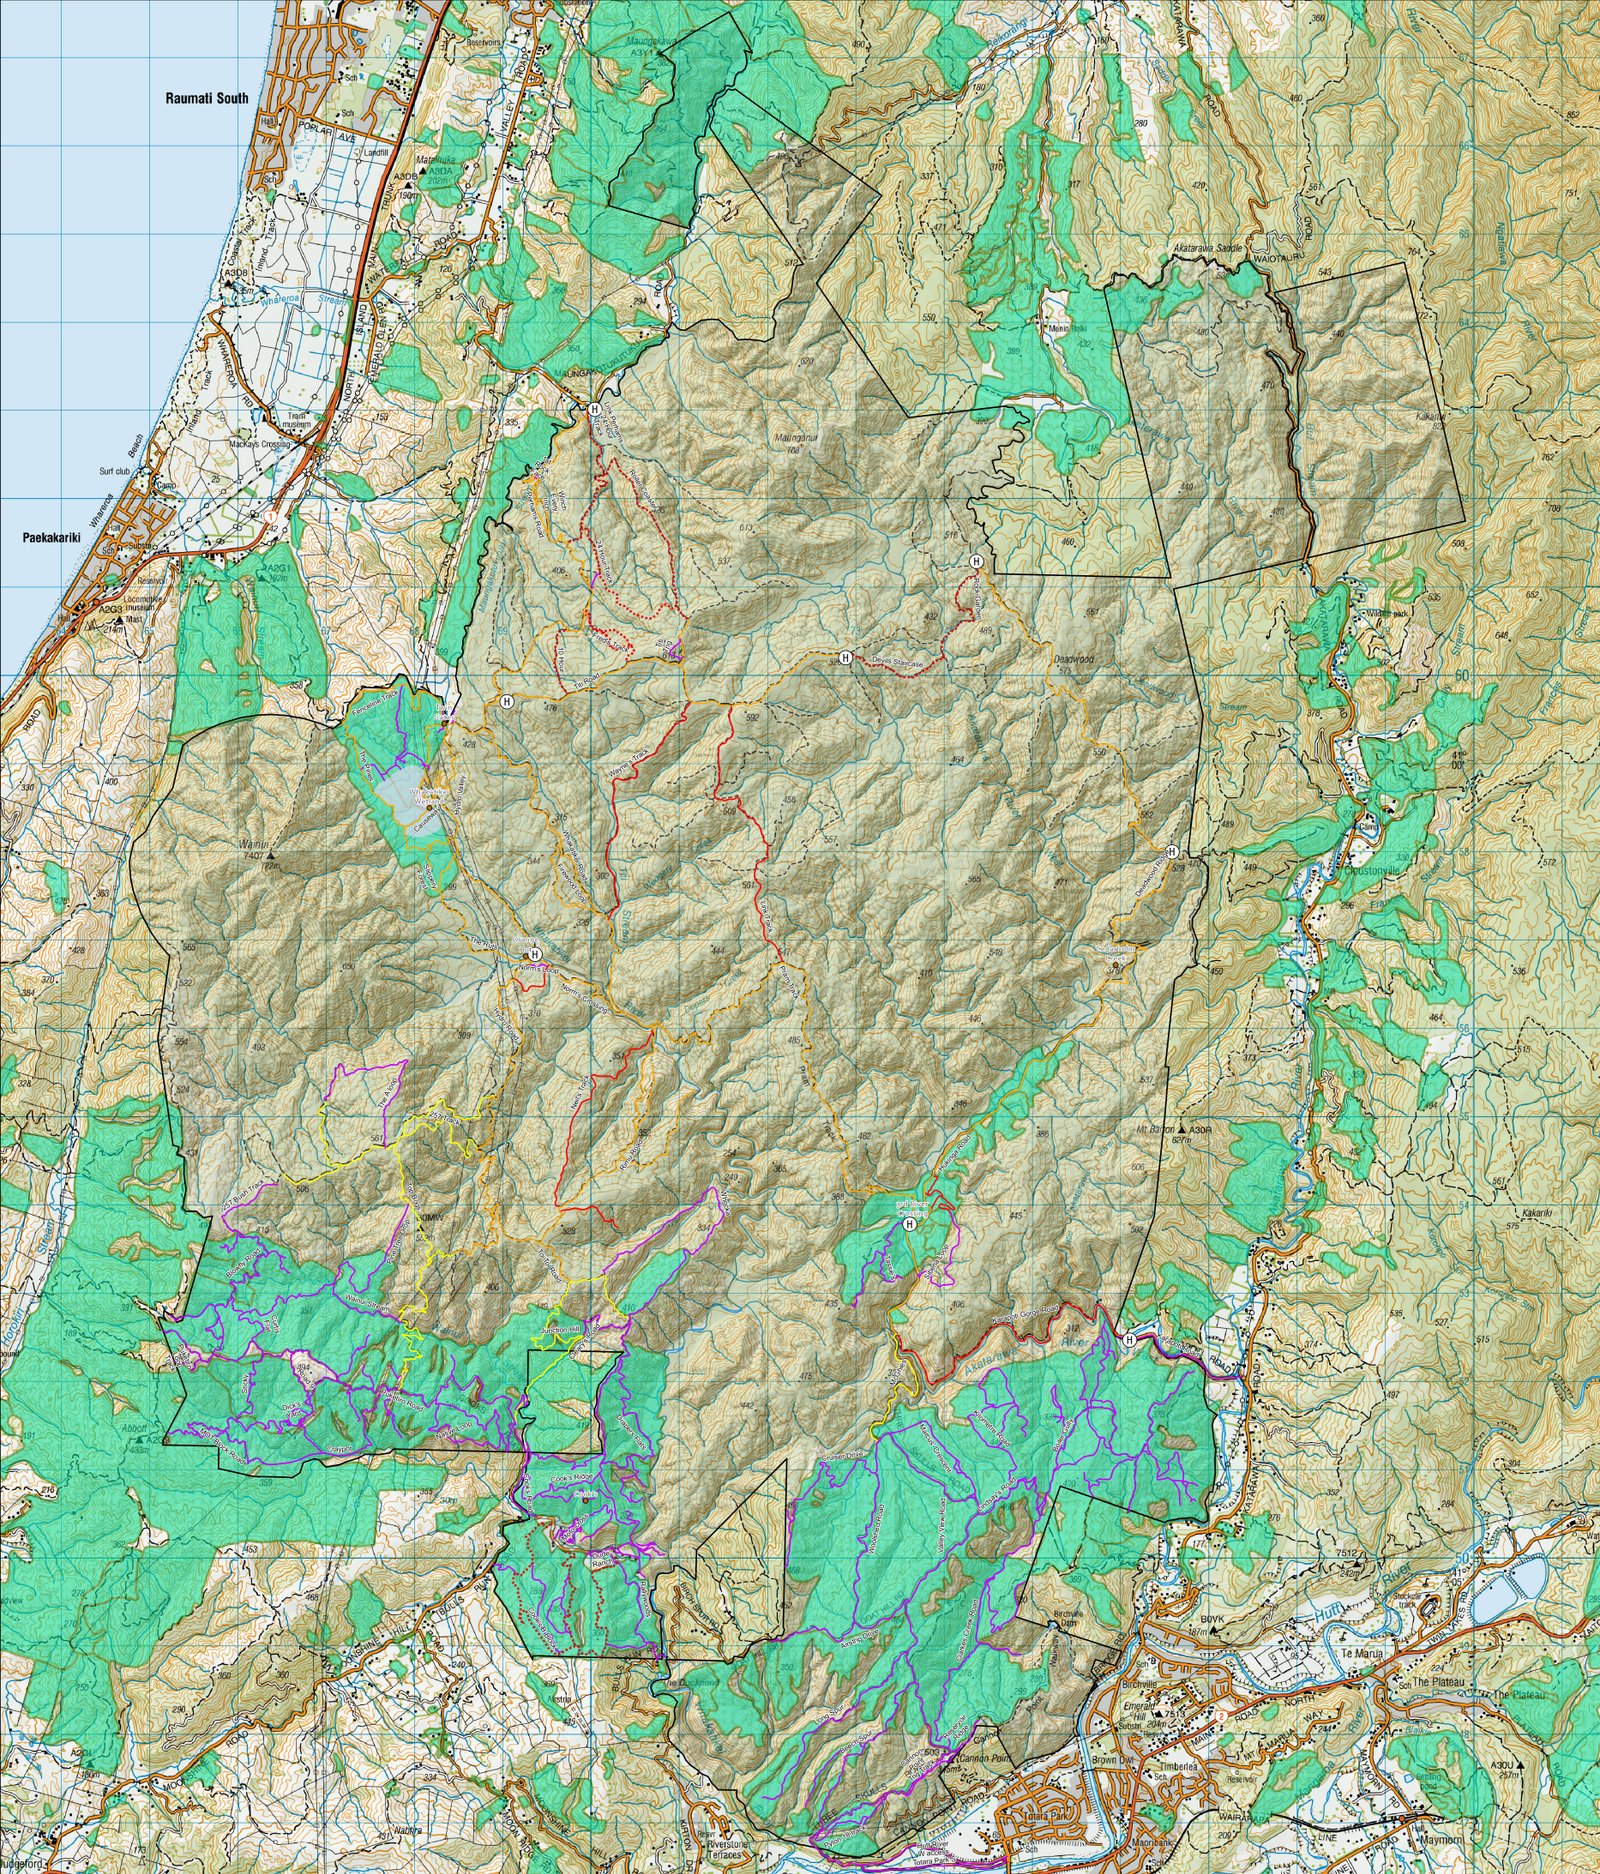
The first step is to assess the file. The base map in this case is the NZTopo50 map, so it is already using the NZTM2000 projection. By counting the grid markings (1km each) we can determine that the image covers approximately 18km wide by 21 km high. The image size is 3733 by 4373 pixels, giving approximately 0.206 pixels per meter (e.g. from the width: 3733 pixels/18000m). By examining the grid markings on the map, or by comparing to the location in the NZTopo50 app, it can be determined that the top left hand corner of the image is approximately at 1764000 easting and 5467000 northing.
The second step is to correct the image resolution. From the info at the top of the page on the map format used in the app, zoom level 9 has a resolution close to that of our image, i.e 0.23622 pixels per meter, and would be suitable for displaying a map of this resolution in the app. To adjust our image to the resolution used for zoom level 9 we need to scale the image from 3733 pixels wide to 3733*0.23622/0.206, or 4280 pixels. This can be done using any preferred image editing software.
The third step is to determine the starting point for the tiles. By taking our approximate reference near the top left corner of the image, 1764000E,5467000N, we need to subtract the reference point used by the app, 1560000E,6200000N (for northings the value is subtracted from the reference point) and divide by the tile dimension used, 1024, and multiply by the pixel resolution 0.23622. This gives 47 for the easting and 169 for the northing when rounded to the nearest whole number and represents the tile number closest to our starting point. This tile will be represented, from the format given above, as file m0900470169.jpg. 09 is the zoom level, 0047 the easting index, and 0169 the northing index.
The fourth step is to calculate the exact starting point for our first tile. The tile with index 0047 0169 has a top left easting of 0047/0.23622*1024+1560000, and northing of 6200000-0169/0.23622*1024, or 1763740E,5467402N
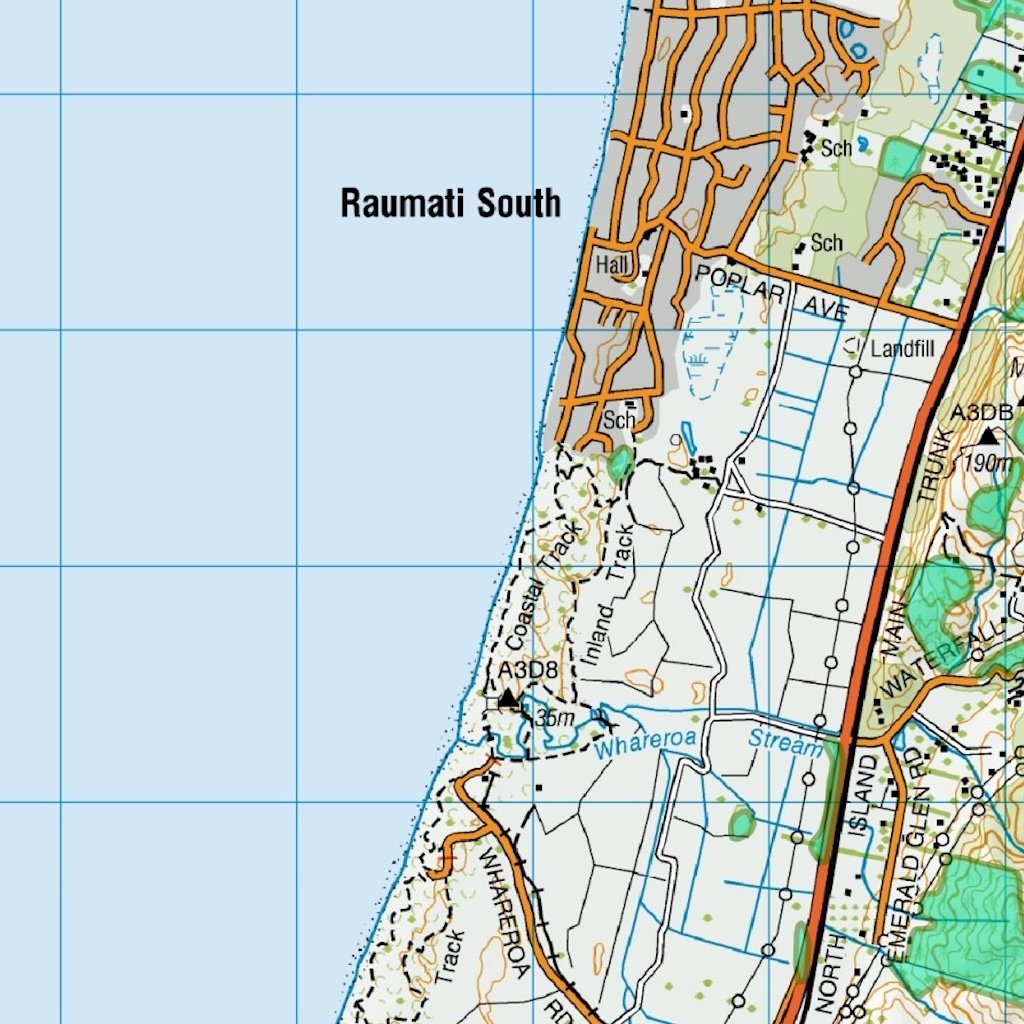
Now we are in a position to create tiles. Locate the grid reference 1763740E,5467402N in the image using the grid and make a rectangular selection from this starting point to a point that is 1024 pixels east and 1024 pixels south. 1024 pixels is the width and height of the tiles used in the nztopo50 app. If you copy and paste this selection as a new image then it should look like the image below. Name this file m0900470169.jpg and save it in .jpg format.
Now you simply need to keep selecting and creating tiles with 1024 by 1024 dimensions. The tile immediately to the right/east of the first one will have file name m0900480169.jpg, the file immediately to the south will have an incrementally higher value for the northing index; m0900470170.jpg. Copy all of these tiles to a folder on your phone and then select the folder as the custom map folder in the NZTopo50 app to display them in the app.
The custom images just created will show only when zoom level 9 is being displayed. You will notice, for example, that if you zoom in further then the default zoom level 10 tiles will display. For a more complete custom map you might wish to generate tiles at other zoom levels. This can be done, for example by taking the generated tiles, resizing them to twice the resolution, and then splitting this into their respective 4 tiles at the next highest zoom level. A complete set of tiles including zoom levels 10 and 11 should look like this (50MB zip file, you’ll need to unzip the files before saving them to your phone if you use these ones).
You may also wish to generate lower resolution images for zooming out further, and edge cases may be relevant: If a tile extends beyond the border of the custom image you are working with then you would need to create a full sized tile and paste the partial content into it, leaving a section of the tile blank. The blank section will display as a blank section in the app unless you fill it with other map content.